


Denise at the Painted Home
Lisa at Serendipity Chic Design
Me, Heather :) at Paper Princess Studio
Kacey at Refreshed Decor
Samantha at Two Become One
Those of you who have been friends for awhile, know my infatuation and need for color in my life and in my home. When my hub and I purchased our home 3 years back we fell in love with so many things about our home. One huge bonus with our home was that the previous owners had left all the walls in the house white, meaning it left a blank slate for us to have fun with :). Over the past few years we have painted nearly every wall of our home. I know you all know how dramatically some paint can change a room and I LOVE seeing the transformations.
Well, when I was contacted by Scotch Blue to participate in this paint party blog hop I knew exactly what DIY paint project I was going to tackle= our guest bedroom. Our guest bedroom was one of the last rooms in the house needing a make over and I couldn't wait to start this project. I knew I wanted something fresh and light for this room so I decided to add some of my favorite elements and textures= burlap (of course!!), board and batten (have never done this but love the look of it so decided to give it a try), and a little splash of color for the walls. Here is the before:

And here are a few after shots:

 I adore the look of the board of batten- so fabulous!!! And so easy to create! There are many DIY tutorials for the board and batten out there in the blogosphere so I simply followed the tutorials in no time the room was transformed. My ScotchBlue painters tape was a life saver in this project as we actually used Liquid Nails to adhere the board and batten to the walls. That was not part of 'the plan' but we ran across a bizarre obstacle as we attempted to attach the board and batten to one of the walls- the nails would not hold to the wall. Of course we came across this obstacle after we already had 1 and half walls complete so we had no choice accept to resort to liquid nails. That's when my ScotchBlue came to the rescue; we simply applied a bead of Liquid Nails to the back of the board and batten, placed it on the wall, and then used the ScotchBlue to help hold the board and batten while the Liquid Nails dried...thanks goodness for ScotchBlue :)!!
 I also picked up a gallon of 'Oops paint' from Lowes and used that to add a splash of color to the top of the board and batten. Again, the Scotch Blue was a huge help in aiding in the color transformation of this room.

Once the board and batten was up, color was on the walls, it was time to create some window treatments. I simply purchased a drop cloth, added some burlap ruffles to the top, and in no time some texture was added to the room via the quick, simple, and very inexpensive window treatments.

This part of the room is still in progress but I thought it would be fun to create some visual appeal on the ceiling using a large stencil.
 I'll be honest this is turning out to be MUCH more difficult then I thought it would be. It takes A LOT of time as you have to wait for each area to dry before you can move your stencil to the next area. Being patient is only half the battle though- the most difficult part of this task is that the paint tends to seep under the stencil= no bueno :(! This is what I have concluded...you must use spray adhesive to assist and holding the stencil to the ceiling, painters tape will be your best friend in this project also aiding in holding your stencil to the ceiling, a little paint goes a long way (the more paint on your roller the greater the chance of paint seeping under your stencil will be)), and after many failed attempts I now know that you must use a high density foam roller to apply your paint. If any of you out there have any helpful hints on how to make this task any easier I would love to hear :)!!
 I'm still adding some decor elements to this room and I'll share those as they come along. But at least for now I have the canvas done so now I can have fun embellishing...
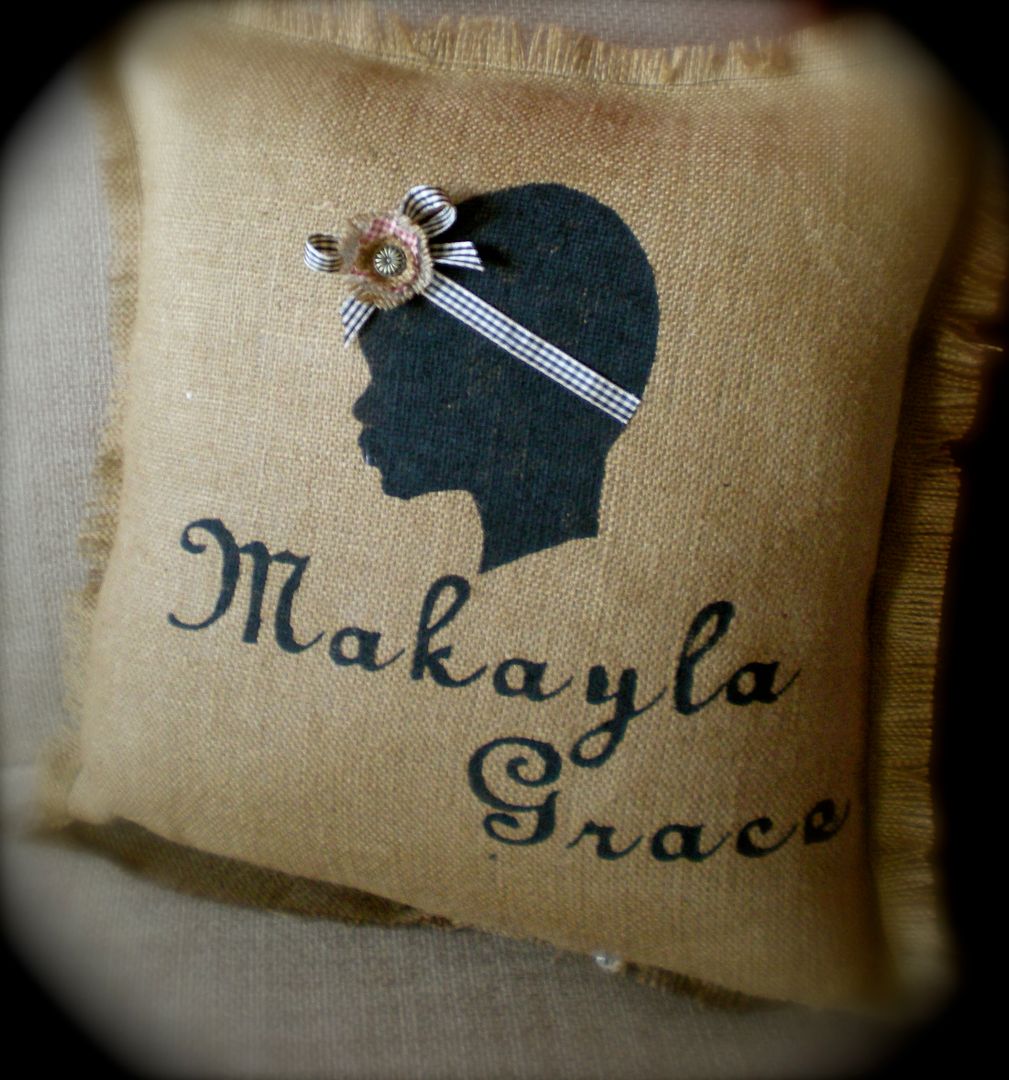
Like adding some fun pillows
 (hint..hint....the pillows are part of a very exciting announcement I will be sharing VERY soon- so stay tuned for that ;)
 I thank those of you who are new to my blog 'Paper Princess Studio' for stopping by- please come back soon, I love having/ meeting new friends!! Don't forget to continue along ScotchBlue Painters Party blog hop by moving on to Refreshed Decor by Kacy.
If you have a DIY paint project you would like to tackle, no doubt you will need some Scotch Blue painters tape to get the job done- Would you like the chance to get this for FREE?!? Well make sure to leave a comment on how you would use the painters tape for a chance to win some for yourself. For a chance to win another sample, make sure to weet “@scotchbluebrand I want #supersharppaintlines for my next project!
Make sure you also 'like Scotch Blue on Facebook so you can stay in the know for upcoming promotions and paint party info.
*ScotchBlue Brand reached out to me to participate in the ScotchBlue Painting Party to celebrate the launch of their new ScotchBlue Painter’s Tape with Edge-Lock Paint Line Protector. My post represents my honest experience with ScotchBlue Painter’s Tape. I am not being paid for my answers, but I did receive ScotchBlue Painter’s Tape to assist in completion.


1 comment:
It turned out great! Love that board and batten - and the paint color! Beautiful.
Kacey
Post a Comment