


And Yeah, I'm finally done :)! I first came across this reading wreath tutorials on Living with Lindsay and immediately knew I had to make one for our home. I thought a great place to house it, would be on the double doors leading in to my craft studio. I loved the idea that the wreath incorporated book pages, as the entrance to my studio is off of our loft which has been made into the library and David's Biblical study area. The perfect combo for this space- book pages to tie in the library/loft area and a crafty unique wreath leading into Paper Princess Studio :)
 Could it get any better??
I thought I would share the how to, in case you are inclined as I was to make one for yourself :). They are really pretty easy but be warned, a bit time consuming (but in my book, so worth it!)
Materials needed:

wreath (foam, wicker, whatever you may have on hand- I purchased mine from the dollar store)
An old book that you don't mind demolishing
A Cuddlebug, Cricut, or hand punch (I ran my scalloped circles through my Cuttlebug using a scalloped nestability die I had)
Ink (if you choose to antique it as I did)
Hot Glue
And A LOT of patience :)
Ok here we go:
. I started by spray painting my wreath black. I don't think it is necessary to do it now that I've completed them but it sounded like a good idea at the time- LOL

. Punch and or cut a million circles (size and style of your choice) Like I mentioned above, I used a scallop circle die because I liked the softness and touch of femininity it added.
 Oh, and btw- don't cut literally a million but do cut A LOT. I was to lazy to count how many I used but I did take a pic. so you get a good idea of how many it takes to complete ONE wreath...That's right, all of these circles were used to make just 1 wreath.
. Now come the fun and L-O-N-G part of this project...adhering them to your wreath
-Begin, by folding your circle in half

-now fold it in half again, like so

- Now 'fluff' out your folds like this

Adhere to your wreath.
.Once your wreath is good and full, it's time to add that old world charm by antiquing the pages. My fav. way to antique is to use my absolute fav. ink...Chestnut roan. Simply dab your foam brush in the ink and rub directly onto your pages.


.When I was done antiquing mine, I still wanted a lil something something, so I decided to take my wreaths outside and spray paint them. I was a bit hesitant on doing this because what if it ruined my wreaths after all the time I had spend on them, but let me tell you, I am Soooo glad I did it. I actually used 3 different color sprays on them (Caramel latte, champagne nouveu, and sesame something)...sorry I don't have the exact name but they are currently outside on my patio table and it is way to hot to go downstairs and get the name- It is 116+ here in Phoenix people ;)- LOL. I can tell you, they are all by Krylon and they are all beautiful shimmer sprays.

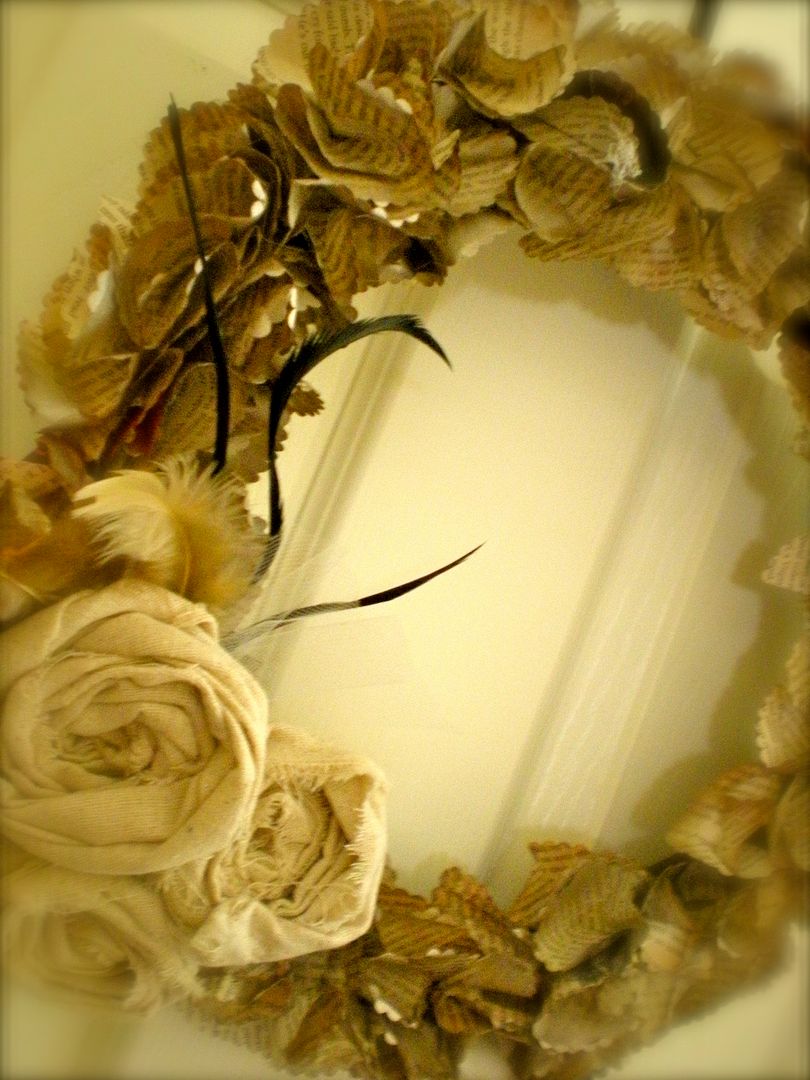
. Ok, almost done- After all the antiquing and spraying there was still something missing to give it that WOW factor so I decided to add some rolled fabric rosettes. Now we're talking :) A lil more fluff added using feathers, and tulle and we are totally in business

I am so loving these wreaths, the perfect element to dress up this space.
*Tips*
The fuller your wreath, the better (it looks so much better the fuller it is. That does mean more time but so worth it!)
There are many great tutorials out there so check them out and get inspired. Here are some that I found- The Red Chair, Katydid and Kid,andShow and Tell.


20 comments:
They look really fabulous!! Love the extra feathers you added to the flowers! Nice job!
Love how your wreath turned out! So pretty!
Exquisite, you make it sound so easy but I know that was a ton of work. You ended up with a really classy wreath!
Tracey
Oh I just adore your version. Love the way you folded the paper and the added rosettes are adorable. fantastic job! So pretty! Hope you have a fabulous weekend! ~ Stephanie Lynn
This looks incredible! I love this idea!
I love projects that involve books :) Such a neat idea!
This is gorgeous!!
You are so right! They ARE absolutely beautiful. Thanks for sharing this great idea and the tute was so good, I think even I might be able to make one! Whoo hoo!
Beautiful and the fabric flowers and feathers make them ultra-chic! Great project.
This is really beautiful! Your embellishments really do the trick and take it to the next level :)
This turned out so pretty! Thanks for sharing at along for the ride.
Freakin' gorgeous! Every element you used just stepped up your project to another level. Spray painting was genius for that soft vintage look. The rosettes and feathers? Lovely. This is one of the prettiest book page wreath projects I've seen.
Heather I just adore your version - adorable! Thanks so much for joining the Sunday Showcase Party - I greatly apprecite it. Hope you have a wonderful week! ~ Stephanie Lynn
I just wanted to stop by and let you know that I linked to this post today from the new Home & Garden channel at Craft Gossip. :) My hope is to share many of the fabulous projects I see everyday with the vast CG audience. I hope you will not only stop by and subscribe to CG, but will tell your friends about the new category! Hope you see some traffic from it!
Your feature will appear in the main Craft Gossip RSS feed, on the main home page and can be found directly here
http://homeandgarden.craftgossip.com/book-pages-wreath/
so glad i found this so classy love it
So beautiful! Visiting from Tatertots and Jello. Congrats on the feature!
I LOVE LOVE LOVE the roses with the feathers. It looks so elegant.
This is such a beautiful way to do a book wreath~ I love how you cut the paper like you did! Oh, and those rosettes are the perfect touch! :) I have been wanting to make a book wreath for a while, and had printed out Lindsay's tutorial. But the book I was using was old and the pages were larger than the average book. (And the pages were a bit brittle.) The old look was neat, but it just wasn't working well. Now I have a "normal" book...maybe it will work this time? Let's just say, yours inspires me! :)
Have a wonderful day!
Blessings,
Jenni
{Beautiful Nest}
I think this is super neat! I like to make notebooks out of old hardcovers so I have a lot of extra pages lying around. I featured this in a book-ish tutorial roundup today!
http://founditmadeit.blogspot.com/2011/04/crafting-with-book-pages.html
One of my favorite bookpage wreaths in the blogosphere. Great job!!!
Post a Comment